Dissolve shader tutorial
Dissolve shader is probably one of the commonly used ones, there are a lot of tutorials online about it. This one is aimed at beginners and I’ll try to go into as much detail as possible into what is happening and why. With that said - I am not a shader expert and I would advise to learn from multiple sources.
Examples of code provided are from Godot shaders, but principles behind them are the same for Unity as well.
Alright, let’s begin. Create a new shader and put the code below in it.
1
shader_type canvas_item;

void fragment()
{
	vec4 originalTexture = texture(TEXTURE, UV);
	COLOR = originalTexture;
}
This is a bare minimum for our shader to display the sprite we’re assigning to the sprite node. Everything that goes inside fragment function from this point onward is going to be placed between originalTexture and COLOR.
Usually dissolve shaders use noise texture to dissovle object in a pretty way.
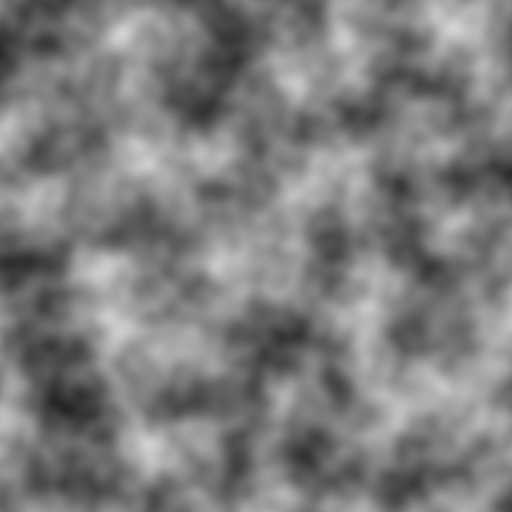
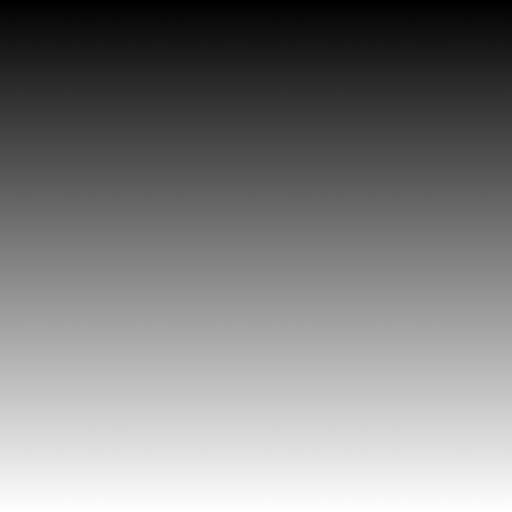
We’re going to use a simple gradient first to better see what is happening under the hood.
Let’s create a property for it. Write this below the shader type and above the fragment function.
1
shader_type canvas_item;
uniform sampler2D noiseTexture;
void fragment()
{
	vec4 originalTexture = texture(TEXTURE, UV);
	COLOR = originalTexture;
}
And assign gradient both as sprite image and as a noise texture. Write the next line down inside the fragment function so we could use the noiseTexture in our code:
1
shader_type canvas_item;
uniform sampler2D noiseTexture;
void fragment()
{
	vec4 originalTexture = texture(TEXTURE, UV);
	vec4 dissolveNoise = texture(noiseTexture, UV);
	COLOR = originalTexture;
}
We have our base setup, so now let’s get to changing the way the shader works!
As you probably know the black color is where red, green, and blue channels are 0 and white color is where they all are at max value. In terms of shaders that would be from 0 to 1 in every channel. Since we have a gradient that goes from black at the top and white at the bottom we basically have a range of numbers from 0 to 1. And now we can define a number that serves as a limit – if another number is lower that the limit, we set that number to 0, if it’s higher – we set it to 1. This way we have to separate areas – which is perfect for us since we’re want to define a black and white parts of the image. The example of how it would look like will be below, for now let’s add some code to help us visualize the process.
First we need to be able to define the limit, let’s call it dissolveAmount:
1
shader_type canvas_item;
uniform sampler2D noiseTexture;
uniform float dissolveAmount : hint_range(0, 1);
void fragment()
{
	vec4 originalTexture = texture(TEXTURE, UV);
	vec4 dissolveNoise = texture(noiseTexture, UV);
	COLOR = originalTexture;
}
Next we could write something like this to have the border between two areas:
1
if(originalTexture.r < dissolveAmount)
	original Texture.a = 0.;
else
	originalTexture.a = 1.;
But using if statements in your shaders is not advisable, so let’s use step function instead because we will get the same result.
Add the next line in the fragment function:
1
shader_type canvas_item;
uniform sampler2D noiseTexture;
uniform float dissolveAmount : hint_range(0, 1);
void fragment()
{
	vec4 originalTexture = texture(TEXTURE, UV);
	vec4 dissolveNoise = texture(noiseTexture, UV);
	vec4 step1 = step(dissolveAmount, dissolveNoise);
	COLOR = originalTexture;
}
You won’t see any changes, but if we change the last line to this:
1
shader_type canvas_item;
uniform sampler2D noiseTexture;
uniform float dissolveAmount : hint_range(0, 1);
void fragment()
{
	vec4 originalTexture = texture(TEXTURE, UV);
	vec4 dissolveNoise = texture(noiseTexture, UV);
	vec4 step1 = step(dissolveAmount, dissolveNoise);
	COLOR = originalTexture;
	COLOR = step1;
}
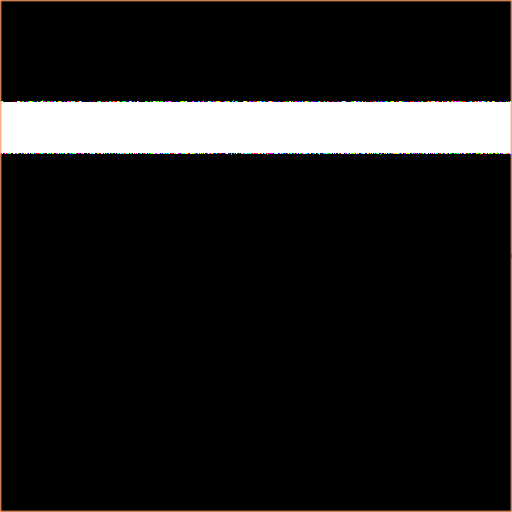
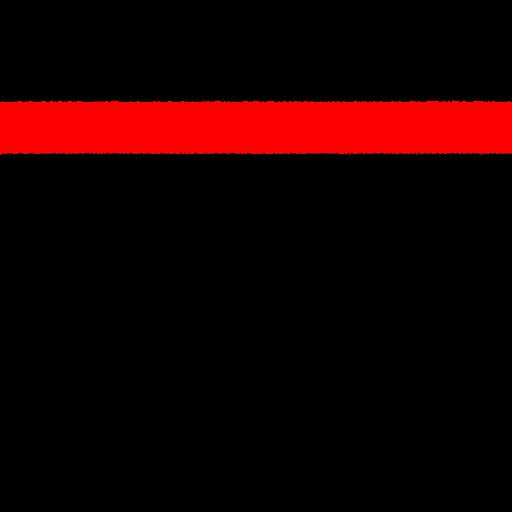
We can see that gradient is gone, and there are two separate areas. Change the dissolveAmount slider to see how it affects the image.

We named the variable step1, because we’re going to use another step with slightly greater dissolve amount to add the glowing edge.
Let’s add the property for it:
1
shader_type canvas_item;
uniform sampler2D noiseTexture;
uniform float dissolveAmount : hint_range(0, 1);
uniform float edgeSize = 0.1;
void fragment()
{
	vec4 originalTexture = texture(TEXTURE, UV);
	vec4 dissolveNoise = texture(noiseTexture, UV);
	vec4 step1 = step(dissolveAmount, dissolveNoise);
	COLOR = step1;
}
And use it in another step function:
1
shader_type canvas_item;
uniform sampler2D noiseTexture;
uniform float dissolveAmount : hint_range(0, 1);
uniform float edgeSize = 0.1;
void fragment()
{
	vec4 originalTexture = texture(TEXTURE, UV);
	vec4 dissolveNoise = texture(noiseTexture, UV);
	vec4 step1 = step(dissolveAmount, dissolveNoise);
	vec4 step2 = step(dissolveAmount + edgeSize, dissolveNoise);
	COLOR = step1;
}
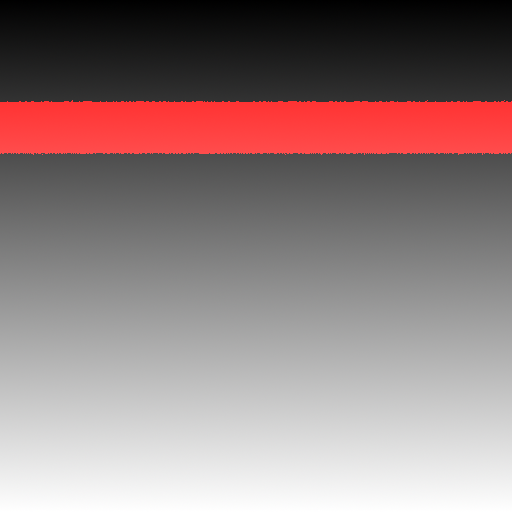
You can see how it looks by assiging COLOR to be equal to step2.
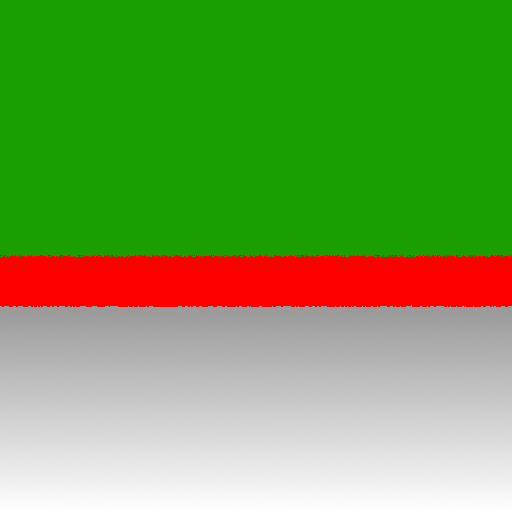
Now we can get the area of the edge by subtracting step1 from step2. Area that is white in both textures will be black – since subtracting 1 from 1 is going to give us 0. And the only area that we’ll be left with is the one where step1 is white and step2 is black.
1
shader_type canvas_item;
uniform sampler2D noiseTexture;
uniform float dissolveAmount : hint_range(0, 1);
uniform float edgeSize = 0.1;
void fragment()
{
	vec4 originalTexture = texture(TEXTURE, UV);
	vec4 dissolveNoise = texture(noiseTexture, UV);
	vec4 step1 = step(dissolveAmount, dissolveNoise);
	vec4 step2 = step(dissolveAmount + edgeSize, dissolveNoise);
	vec4 edge = step1 - step2;
	COLOR = step1;
}
If we change the last line to
COLOR = edge;
You’ll see a completely transparent sprite, that’s because both step1 and step2 variables have their alpha channel value at 1. Subtraction leaves us with 0, which makes the sprite transparent. To be able to see the result we just need to change it back to 1:
1
shader_type canvas_item;
uniform sampler2D noiseTexture;
uniform float dissolveAmount : hint_range(0, 1);
uniform float edgeSize = 0.1;
void fragment()
{
	vec4 originalTexture = texture(TEXTURE, UV);
	vec4 dissolveNoise = texture(noiseTexture, UV);
	vec4 step1 = step(dissolveAmount, dissolveNoise);
	vec4 step2 = step(dissolveAmount + edgeSize, dissolveNoise);
	vec4 edge = step1 - step2;
	edge.a = 1.;
	COLOR = step1;
	COLOR = edge;
}
Now that we have our edge – let’s give it some color. Add it as a property, so it could be easily changed.
1
shader_type canvas_item;
uniform sampler2D noiseTexture;
uniform float dissolveAmount : hint_range(0, 1);
uniform float edgeSize = 0.1;
uniform vec4 edgeColor : hint_color;
void fragment()
{
	vec4 originalTexture = texture(TEXTURE, UV);
	vec4 dissolveNoise = texture(noiseTexture, UV);
	vec4 step1 = step(dissolveAmount, dissolveNoise);
	vec4 step2 = step(dissolveAmount + edgeSize, dissolveNoise);
	vec4 edge = step1 - step2;
	edge.a = 1.;
	edge *= edgeColor
	COLOR = edge;
}
Now that we have all of that it’s time to make things transparent. Before that we were using vec4 variables without accessing individual channels, but this time we’re going to use red channel of our step1 variable to change the alpha of the original image.
Let’s start by adding the edge to our original image:
1
shader_type canvas_item;
uniform sampler2D noiseTexture;
uniform float dissolveAmount : hint_range(0, 1);
uniform float edgeSize = 0.1;
uniform vec4 edgeColor : hint_color
void fragment()
{
	vec4 originalTexture = texture(TEXTURE, UV);
	vec4 dissolveNoise = texture(noiseTexture, UV);
	vec4 step1 = step(dissolveAmount, dissolveNoise);
	vec4 step2 = step(dissolveAmount + edgeSize, dissolveNoise);
	vec4 edge = step1 - step2;
	edge.a = 1.;
	vec4 textureAndEdge = originalTexture + edge;
	COLOR = textureAndEdge;
}
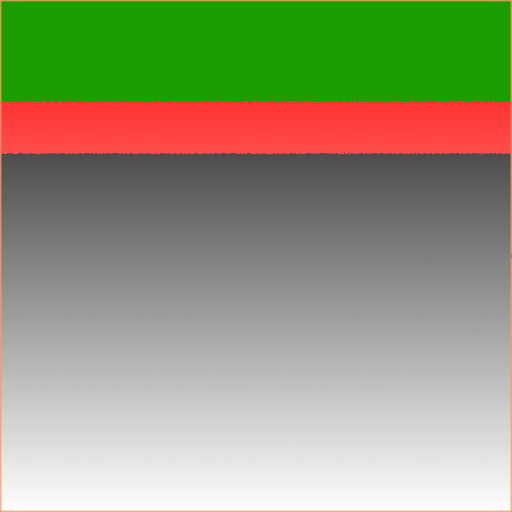
And now we can multiply the alpha channel of the new texture by the step1 red channel values. Areas that were black in step1 variable will be transparent (for demonstration purposes – green).
1
shader_type canvas_item;
uniform sampler2D noiseTexture;
uniform float dissolveAmount : hint_range(0, 1);
uniform float edgeSize = 0.1;
uniform vec4 edgeColor : hint_color
void fragment()
{
	vec4 originalTexture = texture(TEXTURE, UV);
	vec4 dissolveNoise = texture(noiseTexture, UV);
	vec4 step1 = step(dissolveAmount, dissolveNoise);
	vec4 step2 = step(dissolveAmount + edgeSize, dissolveNoise);
	vec4 edge = step1 - step2;
	edge.a = 1.;
	vec4 textureAndEdge = originalTexture + edge;
	textureAndEdge.a *= step1.r;
	COLOR = textureAndEdge;
}
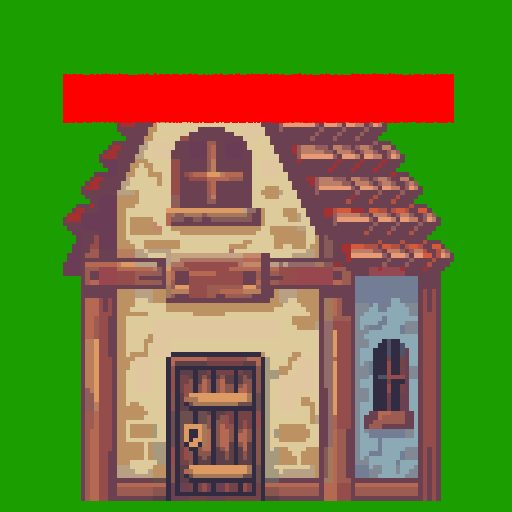
And that seems to be it, but there are few problems with this code. First of all, if you set the dissolve amount to be 0, you still have the edge visible.
This goes all the way back to our step1 and step2 variables and the way we defined dissolveAmount property.
Set the dissolve amount to 0 and edgeSize to 0.1 and then change the last line to
COLOR = step1;
You’ll see a completely white image, now change it to
COLOR = step2;
Since step2 adds edge size we’re left with black area that defines where the edge is supposed to be. One solution to that would be to change the dissolve amount property to go from -0.1 to account for the edgeSize and offset step2 enough so that it can be completely white. But what if we want different objects to have different edge sizes?
We can get rid of the lower and upper limits completely or set them to be very large/small. But it’s more intuitive to have something that is completely dissolved at 1 and completely visible at 0.
And to make it work this way we need to remap the values, here’s the formula that we’re going to use:
https://stackoverflow.com/questions/3451553/value-remapping
(value - from1) / (to1 - from1) * (to2 - from2) + from2
Value is our dissolve amount. From1 and To1 is what we have right now – from 0 to 1.
From2 is what we want our lowest dissolveAmount to be.
To2 can be 1, since our edge doesn’t cause problems at the upper limit, but we can remap it to 1.01, to make sure no artifacts bleed through. In this example the gradient image set to have no compression and you can see “fuzziness” on the colors border, wich can cause edge bleeding into the invisible area.
1
shader_type canvas_item;
uniform sampler2D noiseTexture;
uniform float dissolveAmount : hint_range(0, 1);
uniform float edgeSize = 0.1;
uniform vec4 edgeColor : hint_color
void fragment()
{
	vec4 originalTexture = texture(TEXTURE, UV);
	vec4 dissolveNoise = texture(noiseTexture, UV);
	vec4 step1 = step(dissolveAmount, dissolveNoise);
	vec4 step2 = step(dissolveAmount + edgeSize, dissolveNoise);
	float remappedDissolve = dissolveAmount * (1.01  + edgeThickness) – edgeThickness;
	vec4 step1 = step(remappedDissolve, dissolveNoise);
	vec4 step2 = step(remappedDissolve + edgeThickness, dissolveNoise);
	vec4 edge = step1 - step2;
	edge.a = 1.;
	vec4 textureAndEdge = originalTexture + edge;
	textureAndEdge.a *= step1.r;
	COLOR = textureAndEdge;
}
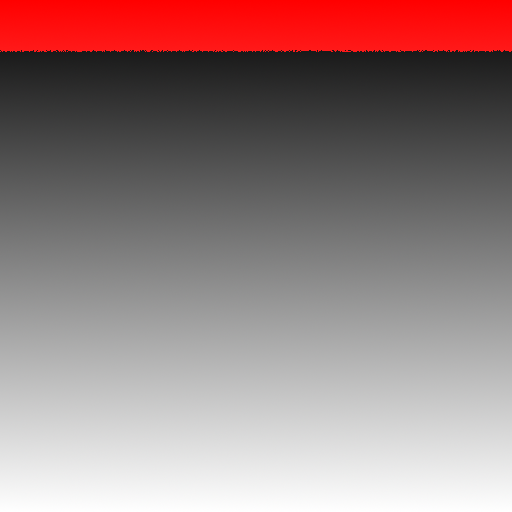
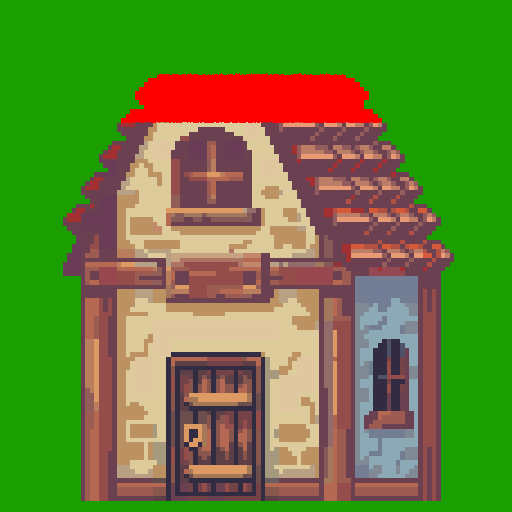
And now our edge can disappear completely!
But there is another issue at hand – if you set dissolveAmount something like 0.5 or lower you’ll see that edge starts to lose color.
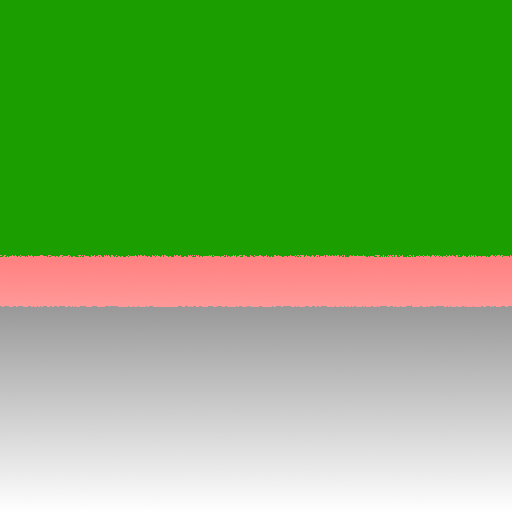
If you want to visualize what is happening – go to color picker again and set red channel all the way to 255, green and blue to 0. This is our edge color where original image is completely black.
But what if our original image has some color, let’s add it – add green and blue to something like 200, the color you’ll get is very pale pink. Simply adding edge color on top of the original image won’t work if we want a clearly defined edge color regardless of the original image color.
There is a solution to this problem – mix() function. It requires 3 parameters, the first two are just color information we want to “combine”, and the third one is going to act as a mask as to where to apply the second color and discard the first one.
We’re going to create another variable to store the edge color information and use red channel of the edge to define where the color should be applied.
1
shader_type canvas_item;
uniform sampler2D noiseTexture;
uniform float dissolveAmount : hint_range(0, 1);
uniform float edgeSize = 0.1;
uniform vec4 edgeColor : hint_color
void fragment()
{
	vec4 originalTexture = texture(TEXTURE, UV);
	vec4 dissolveNoise = texture(noiseTexture, UV);
	float remappedDissolve = dissolveAmount * (1.01  + edgeThickness) – edgeThickness;
	vec4 step1 = step(remappedDissolve, dissolveNoise);
	vec4 step2 = step(remappedDissolve + edgeThickness, dissolveNoise);
	vec4 edge = step1 - step2;
	edge.a = 1.;
	vec4 textureAndEdge = originalTexture + edge;
	textureAndEdge.a *= step1.r;
	COLOR = textureAndEdge;
	vec4 edgeColorArea = edge * edgeColor;
	vec4 combinedColor = mix(originalTexture, edgeColorArea, edge.r);
	COLOR = combinedColor;
}
We have the line on top of the sprite now we just need to get our transparency back. Let’s use the step1 red channel like we did before.
1
shader_type canvas_item;
uniform sampler2D noiseTexture;
uniform float dissolveAmount : hint_range(0, 1);
uniform float edgeSize = 0.1;
uniform vec4 edgeColor : hint_color
void fragment()
{
	vec4 originalTexture = texture(TEXTURE, UV);
	vec4 dissolveNoise = texture(noiseTexture, UV);
	float remappedDissolve = dissolveAmount * (1.01  + edgeThickness) – edgeThickness;
	vec4 step1 = step(remappedDissolve, dissolveNoise);
	vec4 step2 = step(remappedDissolve + edgeThickness, dissolveNoise);
	vec4 edge = step1 - step2;
	edge.a = 1.;
	vec4 edgeColorArea = edge * edgeColor;
	originalTexture.a *= step1.r;
	vec4 combinedColor = mix(originalTexture, edgeColorArea, edge.r);
	COLOR = combinedColor;
}
Looks like it’s working, but if we change our sprite to something that has transparent areas we will see another issue:
Our egde doesn’t take into account the original image alpha channel. Let’s fix that!
1
shader_type canvas_item;
uniform sampler2D noiseTexture;
uniform float dissolveAmount : hint_range(0, 1);
uniform float edgeSize = 0.1;
uniform vec4 edgeColor : hint_color
void fragment()
{
	vec4 originalTexture = texture(TEXTURE, UV);
	vec4 dissolveNoise = texture(noiseTexture, UV);
	float remappedDissolve = dissolveAmount * (1.01  + edgeThickness) – edgeThickness;
	vec4 step1 = step(remappedDissolve, dissolveNoise);
	vec4 step2 = step(remappedDissolve + edgeThickness, dissolveNoise);
	vec4 edge = step1 - step2;
	edge.a = 1.;
	edge.a = originalTexture.a;
	vec4 edgeColorArea = edge * edgeColor;
	originalTexture.a *= step1.r;
	vec4 combinedColor = mix(originalTexture, edgeColorArea, edge.r);
	COLOR = combinedColor;
}
And that’s it, we have a working dissolve shader! Now we can switch our gradient with a noise texture and we’re good to go.
One last thing we could add is the ability to change the tiling of the noise to allow for more control over the dissolve look.
1
shader_type canvas_item;
uniform sampler2D noiseTexture;
uniform float dissolveAmount : hint_range(0, 1);
uniform float edgeSize = 0.1;
uniform vec4 edgeColor : hint_color
uniform float noiseTiling = 2;
void fragment()
{
	vec4 originalTexture = texture(TEXTURE, UV);
	vec4 dissolveNoise = texture(noiseTexture, UV);
	vec4 dissolveNoise = texture(noiseTexture, UV * noiseTiling);
	float remappedDissolve = dissolveAmount * (1.01  + edgeThickness) – edgeThickness;
	vec4 step1 = step(remappedDissolve, dissolveNoise);
	vec4 step2 = step(remappedDissolve + edgeThickness, dissolveNoise);
	vec4 edge = step1 - step2;
	edge.a = originalTexture.a;
	vec4 edgeColorArea = edge * edgeColor;
	originalTexture.a *= step1.r;
	vec4 combinedColor = mix(originalTexture, edgeColorArea, edge.r);
	COLOR = combinedColor;
}
This is how it would look like with gradient noise and tiling of 4:
Notes
This shader will work with 2d sprites, for 3d objects you would need to make the following changes:
1
shader_type canvas_item;
shader_type spatial;
uniform sampler2D baseTexture;
uniform sampler2D noiseTexture;
uniform float dissolveAmount : hint_range(0, 1);
uniform float edgeSize = 0.1;
uniform vec4 edgeColor : hint_color
uniform float noiseTiling = 2;
void fragment()
{
	vec4 originalTexture = texture(TEXTURE, UV);
	vec4 originalTexture = texture(baseTexture, UV);
	vec4 dissolveNoise = texture(noiseTexture, UV * noiseTiling);
	float remappedDissolve = dissolveAmount * (1.01  + edgeThickness) – edgeThickness;
	vec4 step1 = step(remappedDissolve, dissolveNoise);
	vec4 step2 = step(remappedDissolve + edgeThickness, dissolveNoise);
	vec4 edge = step1 - step2;
	edge.a = originalTexture.a;
	vec4 edgeColorArea = edge * edgeColor;
	originalTexture.a *= step1.r;
	vec4 combinedColor = mix(originalTexture, edgeColorArea, edge.r);
	COLOR = combinedColor;
	ALPHA = step1.r;
	ALBEDO = combinedColor.rgb;
}